Online Learning Troubleshooting
Your Frequently Asked Questions
What are you asking?
The L&T Team are listening to your common troubles and we want to share some common solutions and work arounds more widely. If you don’t find the answer to your query below, email us at learningandteaching.bus@rmit.edu.au
Contents by Topic:
Collaborate Ultra
“I’m trying to share an application with my students, but all they can see is a black screen.”
This issue is caused by using the ‘full screen mode’ in an application. When you open the application, do not use full screen mode, or ‘present’ mode if using PowerPoint.
“When I share an application in Collaborate Ultra, the sound is off.”
When sharing an application, the sound is off by default. Once you select ‘share screen/application’ you will see a tick box in the bottom left hand corner of the pop-up that says, ‘Share audio’. Ensure this is ticked before closing the window.
“When I share my screen, the image repeats.”
Using the ‘share screen/application > share entire screen’ option whilst already in Collaborate Ultra means that the screen will repeat itself infinitely. If on a single screen set-up, you are just infinitely sharing your screen to itself, which results in the image you are seeing.
You can use two screens to deliver your session to get around this. Share from the screen where your Collaborate Ultra is NOT displayed. If you do not have two screens, instead of ‘share screen/application’ > share screen option, use the ‘share files’ option. Image files, PDFs, and PowerPoint presentations can be shared directly from your file browser (these are the only supported file types).
For Chrome users: If you use excel for live formulas, you will need to use ‘share application’. Go to share screen/application > share application > select Excel. In Chrome there is also a share tab available.
Note: Firefox does not support share application or share tab functionality.
“The sound quality is poor and I’m having a hard time hearing and speaking with my students.”
If using a Windows machine, please ensure you are using an external mic where possible. Check the input device that is selected from your system settings (windows menu > system settings > Sound). Also check the volume from the bottom right of your computer.
“I am getting sound feedback during the session.”
As a rule, participants should have their microphones turned off by default unless speaking. Moderators should enforce this at the beginning of a session either by requesting everyone to turn off their mics or by doing it for them.
“I asked my students to download a file, but they are getting an error screen.”
The server won’t cope with an overload of simultaneous requests to download. Instead, upload the files (e.g. the week’s learning materials) into Canvas, allowing students to access them prior to the lesson and to prevent simultaneous download requests. If you want them to access a document only at the time of the class i.e. for an activity – consider sharing it on your screen instead.
“I want to set up Polling before the class begins so I don’t have to do it on the fly.”
Polling can be set up prior to the class beginning. Students will be able to see the poll once they enter the virtual classroom. However, polling can be locked, so students can only respond to the poll when the academic is ready.
To lock the poll, please follow the below steps:
- Open the share content tab
- Select “polling” under secondary content
- Select yes/no or multiple choice.
“I want students to stay in the same break-out group for multiple break-outs within the same lecture/tutorial session.”
Currently, students cannot leave the breakout group and return to the same breakout group within the same session. You will need to recreate the break-out group each time. As a workaround, set up the group work in Canvas or Teams and ask them to jump out of Collaborate Ultra and into those groups at any time during the session or even outside of class-time if working on group assessments.
“I want to allow industry professional access to Collaborate Ultra.”
By default, Collaborate Ultra allows guest access. However, in some cases, this may have been ‘deselected’ in the Collaborate Ultra settings. To fix this:
- Log in to Canvas and navigate to Collaborate Ultra
- Select an existing session
- Ensure that the guest access box is ticked
- Copy and paste the access link into a calendar invite or email to the industry professional.
“I want to access my recorded Collaborate Ultra sessions and rename them.”
You can access your recorded sessions through the following steps:
- Open Collaborate ultra
- Open the ‘Hamburger’ menu (three-line menu in the top left-hand corner)
- Select recordings.
Once you have completed the above, you can rename the recordings through the following steps:
- Select the three dots in the circle next to the recording session you wish to rename
- Select rename
- Follow the below convention (or your schools convention).
We suggest renaming your recordings following this convention:
{WEEK}_{TOPIC}_{TUTOR NAME}
Canvas
“I want to set up a quiz for a group of students in a specific tutorial.”
Canvas does not currently support this function. Instead, you would need to create the same quiz for everyone and share it or create a group of specific students that can access the quiz, but they will still complete the quiz as individuals.
Please note that you can assign an assignment (submission type: text entry, website URL, media recording, file Uploads) to specific groups in canvas. Tick the group assignment box when setting up your assignment. If you have a quiz in your assignment, however, you will not be able to share it to a group.
“I want to allow students to share files and links for discussion within an entire class.”
In some cases, you might want to allow students to share a video, files, or external links for class discussion. The Discussion board within Canvas is the best place to facilitate this.
Note: A group set must be created prior to following the below steps.
- Head to Canvas > Discussion
- Select the ‘+ discussion’ button in the top right-hand corner
- Give your discussion thread a topic title
- Add instructions into the large text field and format accordingly
- Select the relevant ‘options’ for this post
- Select your class ‘Group set’ from the drop down
- Select the date range (from – until).
“I want to allow students to view each other’s submissions, but I have bandwidth issues in the livestream.”
To get around this issue, you can do the following:
- Upload the submissions in studios
- Open the ‘Hamburger’ menu (three-line menu in the top left-hand corner)
- Find the submission you want to share
- Click the three dots
- Select share media
- Add students by name or email or select from the dropdown
- Students will then have access to view the submission
Following this, you can share the discussion post with your students, and encourage them to share their files and links as comments in the discussion post.
Microsoft Teams
“I’ve finished using a private channel and want to delete it.”
Private channels will be deleted by default after one year. They cannot be deleted by someone accessing the channel.
“I want to record a Microsoft Teams meeting.”
If you need to make a recording, Microsoft Teams is not the best software choice. We suggest any of the following alternatives:
- Collaborate Ultra
- Studios
- PowerPoint with voice over (recorded)
“I want to be able to control my student’s computer, so I can help them troubleshoot their Microsoft Teams problems.”
You can gain access to a student’s computer through the following steps:
- Student will need to share their Desktop during a virtual meeting
- You will need to click on the ‘Request Control’ button. (Located next to the share content button)
- Student can grant access to you by clicking on the allow access button on the pop-out at the top of Microsoft teams
- You will now be able to control the cursor on the remote desktop.
Note: For Mac users, special permissions must be granted on the remote desktop ahead of time. Go to Security & Privacy>Accessibility>Privacy and tick the checkbox next to Microsoft Teams.
Please note this will only work in the Desktop version of Microsoft Teams.
Live Connectivity Issues
“How can I prevent (and mitigate) connectivity issues?”
- Limit internet usage – turn off video apps (Netflix, Facetime, Stan, Skype, online games etc.) and close as many browser tabs as you can. As a rule, only have open what you need to run your session.
- Use text effectively – instead of verbal discussions requiring camera and mic, use your chat and comment functions within your chosen software. This option uses less bandwidth.
- Send-out materials prior/post session – spreadsheets, slides or other resources – should be sent out before or after to minimise issues.
- Consider recording sessions – Does your session absolutely need to be live? If not, consider pre-recording and then coupling with a drop-in session where students can book a time slot.
- Have a back-up facilitator – this is especially important if you have known internet connectivity issues in your area.
“What do I do if I experience connectivity issues during my live session?”
- Limit the number of people on mic and camera – in extreme cases, turn off all cameras including the moderator if it is possible (sometimes it might not be if you are doing live demonstrations).
- Hand over to your back up facilitator – if this is an option and their connectivity is better than yours at that given time.
- Hotspot or dial in from a phone – if all else fails, use a hotspot from your mobile or dial in if this is an option.
- Collaborate Ultra:
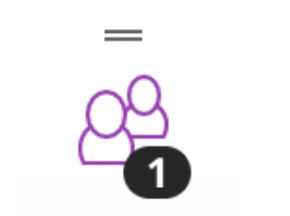
Collaborate ultra has an option to check the connectivity. Select this button in the panel:
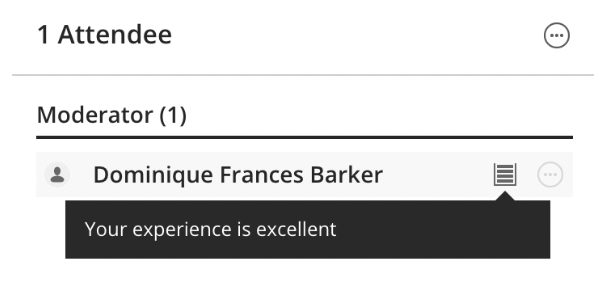
Under moderator, you can click the following icon to see the strength of your connection. If your connection is weak, consider running your session at another time.